
Six years ago, I didn’t know anything about repairing water damage in a vintage camper. I couldn’t imagine the number of hours and the money I would end up throwing at this project. I’m seasoned at this point and I will purchase the next camper with more caution.
I’m not going into detail on this post, but here is a basic list of the work you should expect to do once you realize your vintage camper has water damage.
I should note, the proper thing to do would probably be to tear the camper down to its bones and start there. If you are like me, and don’t have the storage or means to go that route, this method has served us well.
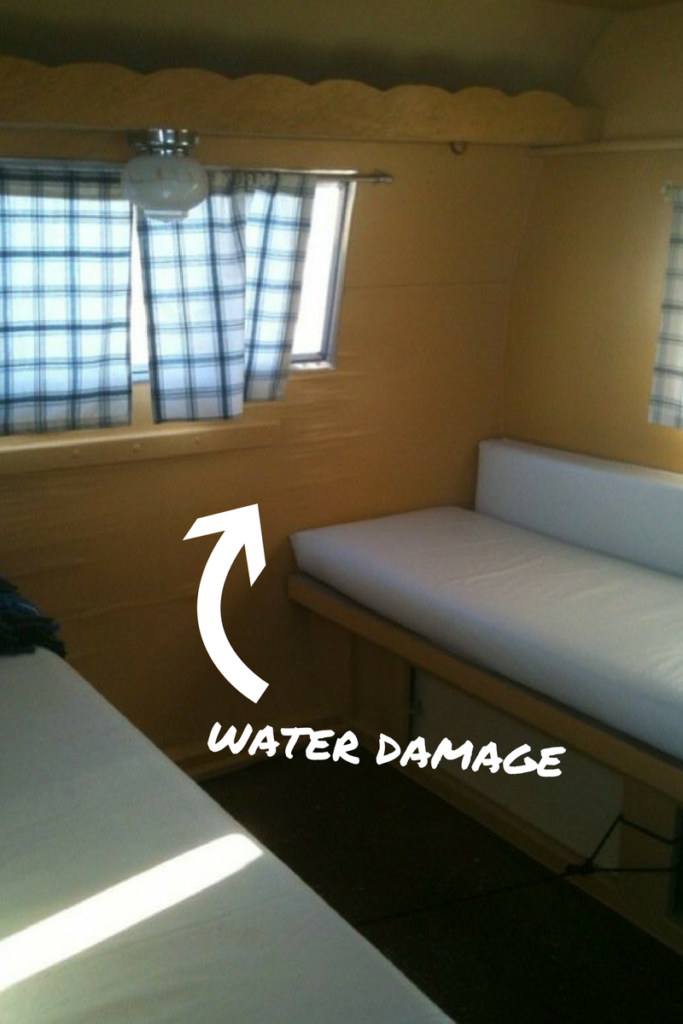
I think we have water damage. How much work am I looking at here?
step 1:screwdriver test
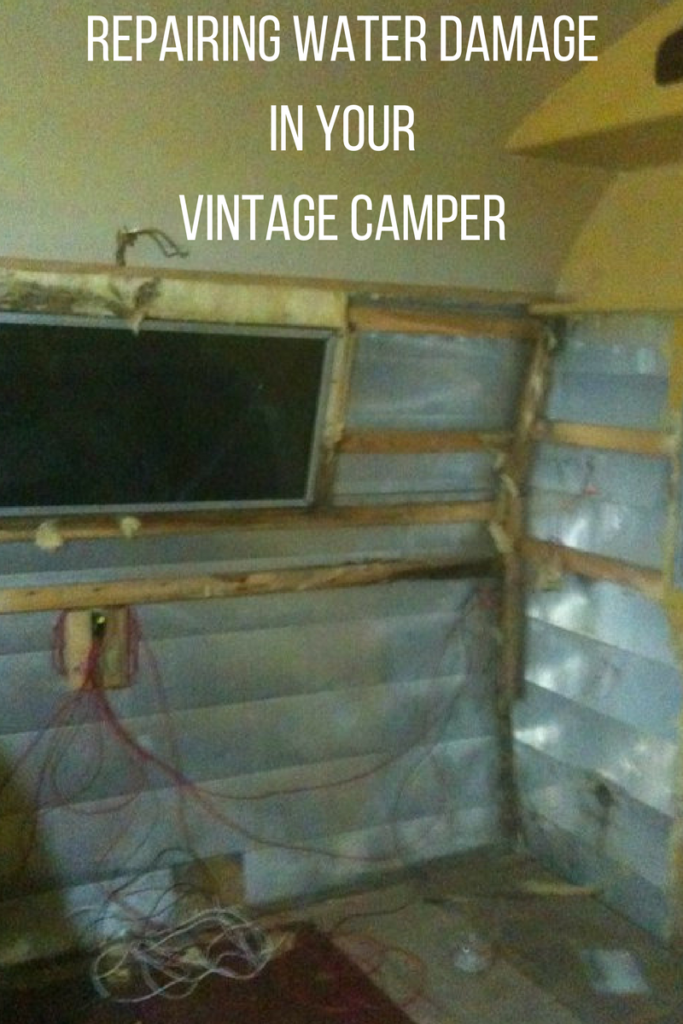
Below you will see signs of water damage on the back panel. Most of the wall below the window was damaged. How damaged? When I poked it with a screwdriver, the screwdriver went through.
Step 2: Peel back damaged areas
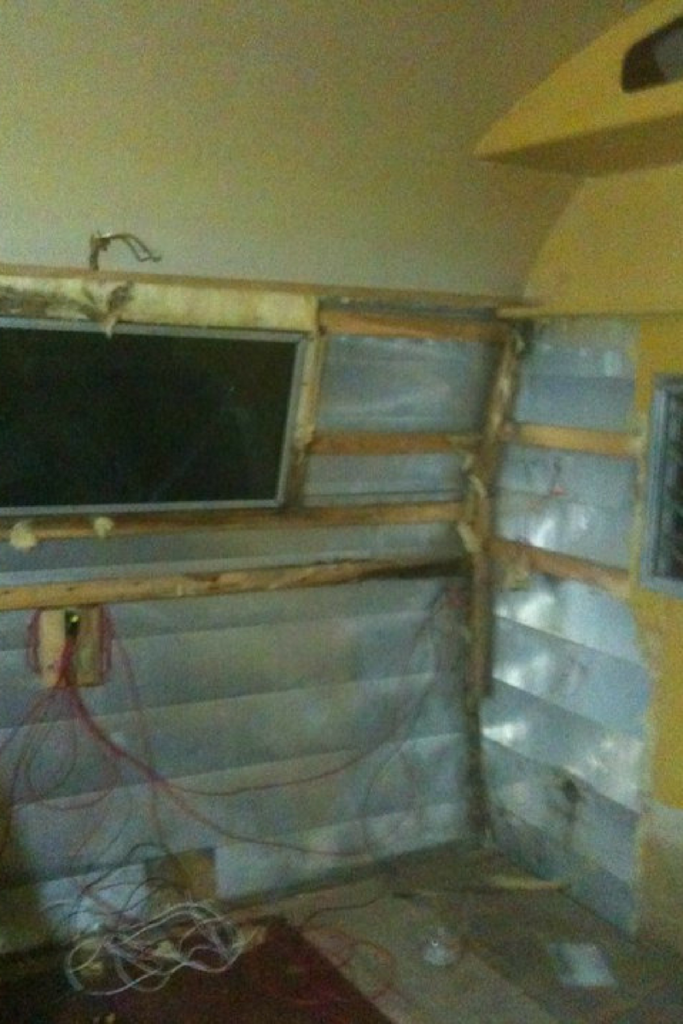
I removed paneling and old insulation until I came to wood that was no longer damaged. Now you have exposed aluminum skin, wires, rotten frame, and probably a few tears. Grab a beer or a glass of wine and ask yourself what you were thinking when you purchased this camper.
Step 3: Seal seams & around screws
Butyl tape is your new best friend. Here are my dos and don’ts for sealing seams to prevent future water damage.
step 4: Remove old framing and reframe
When it was all said and done, we reframed the back end, the roof vent area, and around the entry door. Invest in a Kreg Jig or a Kreg Jig Jr for this job. We used the Kreg Jig Jr. You can read more about this handy tool in this post.
Step 5: Test Your Lights
While you have everything opened up, make sure your tail lights work. All of the wiring goes through the back walls. It is now or never. Our camper required re-wiring. Vintage Trailer Supply, Inc. can cover most of your needs when it comes to vintage trailer lighting.
step 6: Insulate
We used foam board insulation and taped it to the frame with foil tape.
step 7: Install New Paneling and Trim
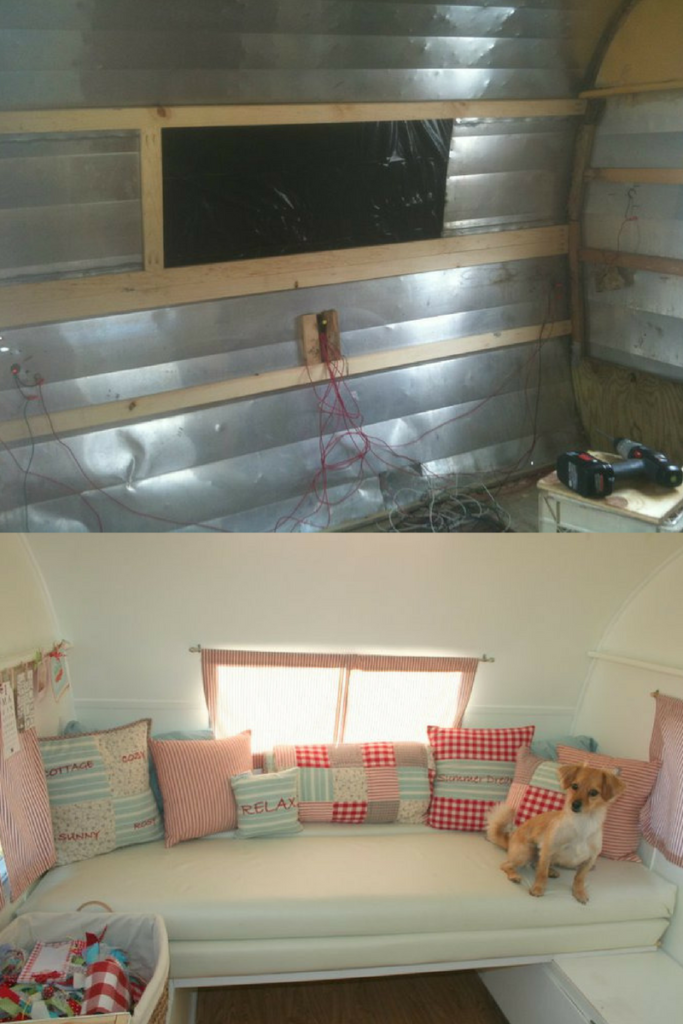
You can read more about the process of re-paneling here. The hardest part for us was finding paneling. I’ve compiled this list of birch paneling suppliers for your convenience.
Step 8: Paint
Or don’t. The purist will keep the original look of stained wood. Doing that would have required us to tear everything out and re-panel it all. It was not something we had the time or means to invest in. So, we painted. Also, I love the clean, white finish. It brightens the place up. When you finish that, grab a beer and try not to think about the next project on your camper list for at least 5 minutes.

You did a great job . I too used a Kreg system . Really made joints easy.I also had a Harbor Freight Oscillating Multifunction Tool . Very useful.
Thank you! If we take on any more projects we might have to look into that tool from Harbor Freight. Thanks for the tip!
I too used a Craig Jig to replace frame 2×2’s . Made some great joints. also used a Harbour Freight elect multi tool also. Both tools are really useful.
I just bought a 1969 Kenskill trailer $400 and I’m pretty I’ll have to gut some of it.
Congratulations on your purchase!
Thank you for your helpful hints on how to fix a leak. I was told when I bought an old 1967 Zipper trailer that the leaks were fixed. Someone put extra metal and sealant caulking, but to no avail. It looks like the top back roof corner has the main leak, but there could be others, noticeable by water drip spots. How did you find the exact area of leak? and did you have to replace ceiling? Mine looks bubbled.
We did replace our ceiling. The roof leak was so bad that a lot of the wood was rotted. If you cannot see visible areas on the exterior where leaks could be coming from, start looking at seams of the siding and where accessories like vents are attached. I completely resealed all of those areas. If that does not work, you might have to take a section of panelling out to see where it is coming from.
what type of wood did you use for the framing, standard framing 2×4 cut down?
We used mostly 1×2 pine boards for most of the framing on Cecilia. On a few occasions I had to rip a 1×4 down to a specific size.