
 I cool my camper with a portable air conditioner. If you are installing a portable air conditioner in your vintage trailer, this walk-through of our system might be beneficial to you. We installed our EdgeStar Portable Ultra Compact Air Conditioner in our Shasta Compact and it has been a great unit. You can read our review here. Six years have passed since I completed this project, so I’m unable to give you the exact measurements of each piece I used. This is more of a general guideline for portable air conditioners instead of a specific guide on how to install the EdgeStar Portable Ultra Compact Air Conditioner.
This portable air conditioner has two lines that you will need to run to the outside of your trailer. I will cover each one separately.
Where Did you put the air conditioner in our shasta camper?
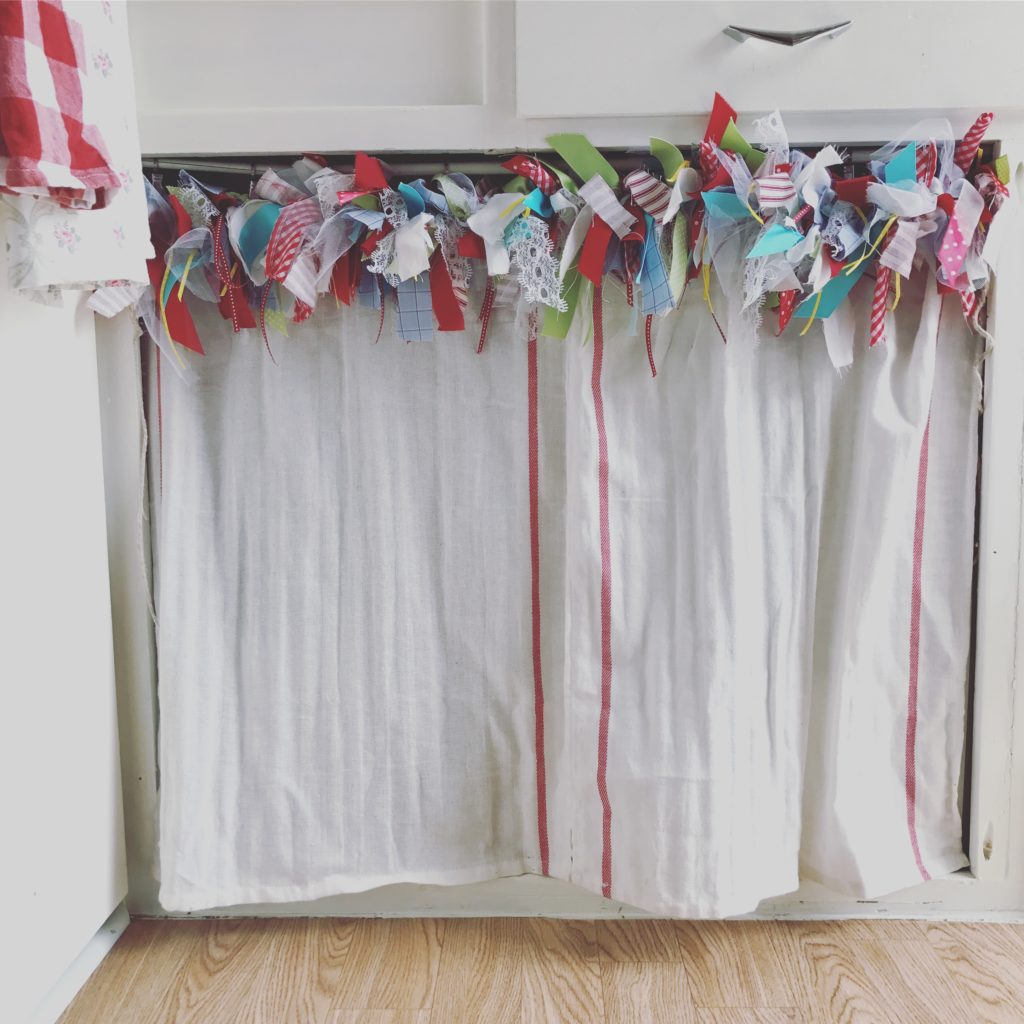
Our air conditioner stays hidden behind the curtains pictured above. Originally, this was the cabinet that housed the plumbing for the sink. As we already mentioned here, we didn’t need a sink.
When I’m ready to cool my camper, I slide the curtain to the side and turn on the air conditioner. I took the curtain down so you could get a better view of the unit.
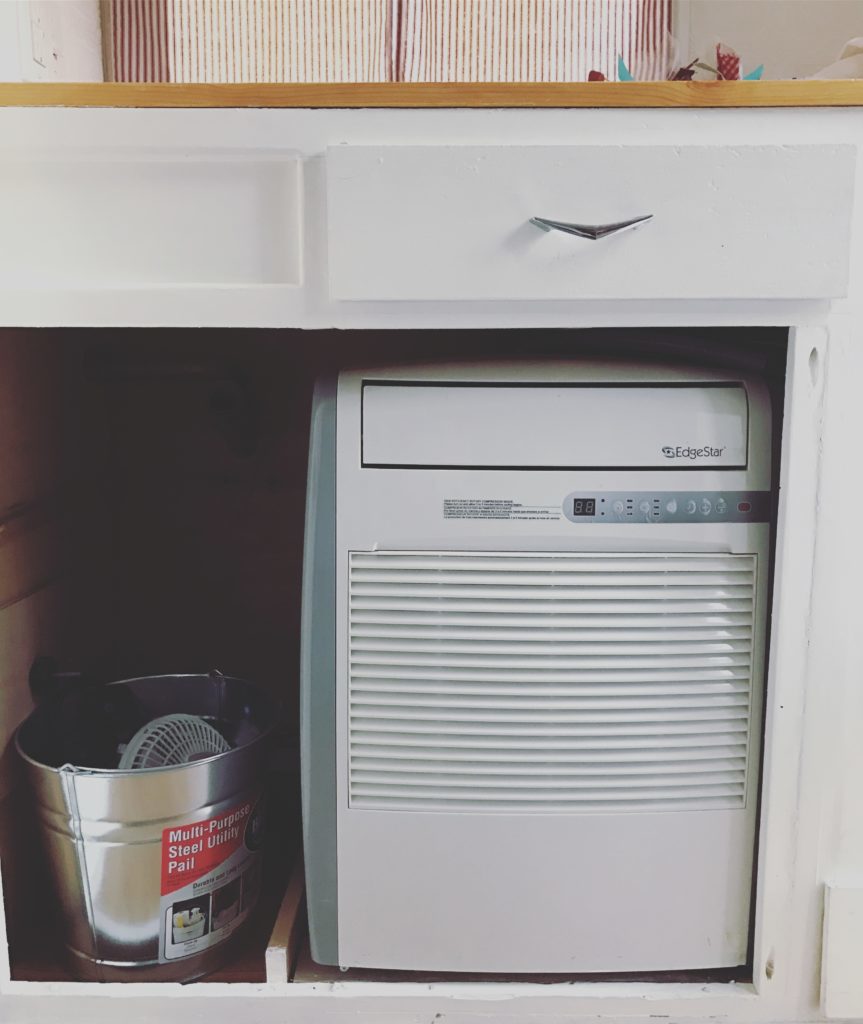
We chose this space because we didn’t want the air conditioner to be an eye sore. Sure, with the curtain removed it looks like a big, bulky, ugly box. Most of the time, you don’t know it is there. We have seen other vintage camper owners place their portable unit in the closet. That storage space was much more valuable to us than the cabinets below the kitchen counter.
This also felt like a smart option because the air conditioner weights 56 pounds. We wanted to add that weight as close to the tongue of the trailer as possible so it would not effect towing capabilities. We also wanted the weight to be centered, instead of distributed to one side in the closet.
Drain line
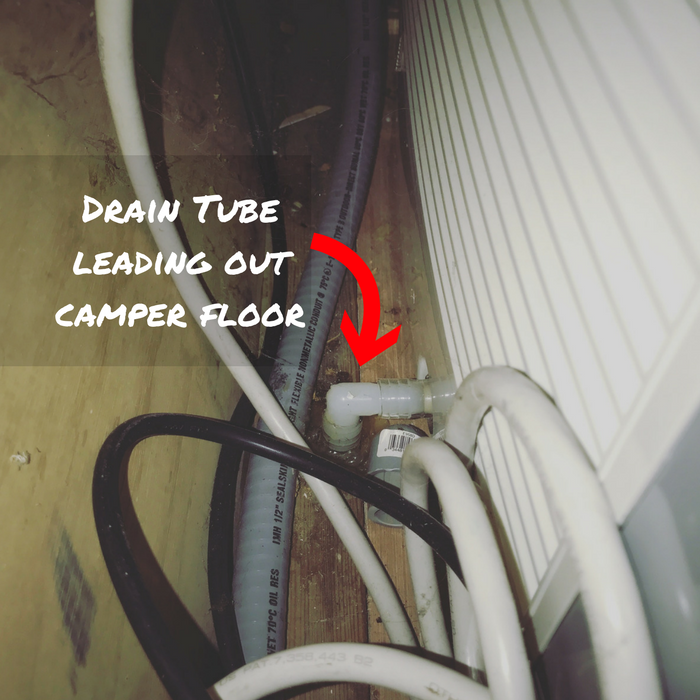
 This drain line is at the bottom of the unit. While the unit is running, condensation drips from this area. To accommodate this, I drilled a hole through the floor of the camper and connected a hose to the unit with a 90 degree barbed hose elbow. This fitting keeps the hose from getting pinched. One end of the barbed hose elbow has a small section of tubing connecting it to the drain outlet on the air conditioner. The other end of the fitting has a longer piece of hose that runs through the floor of the trailer to the outside.
I bought clear hose that was the same diameter as the drain outlet on the back of the air conditioner and attached the hose. In the beginning, I tried PVC pipe. The lack of flexibility caused the PVC pipe to pop loose from the camper when it was being transported to the campground. The clear, flexible hose has worked much better.
The other end of the hose runs outside the camper through the hole I drilled in the floor. I used silicone caulking to seal the space between the hole and the tube, to ensure insects couldn’t use it as an entry point.
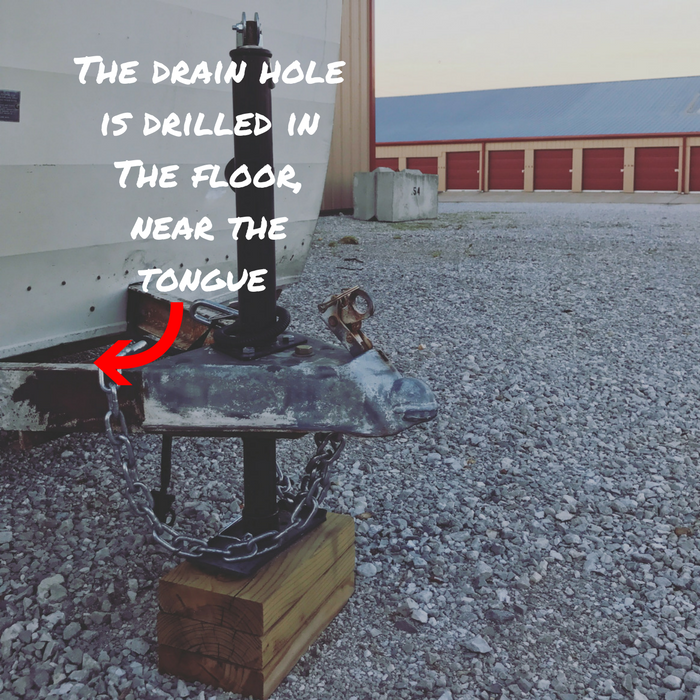
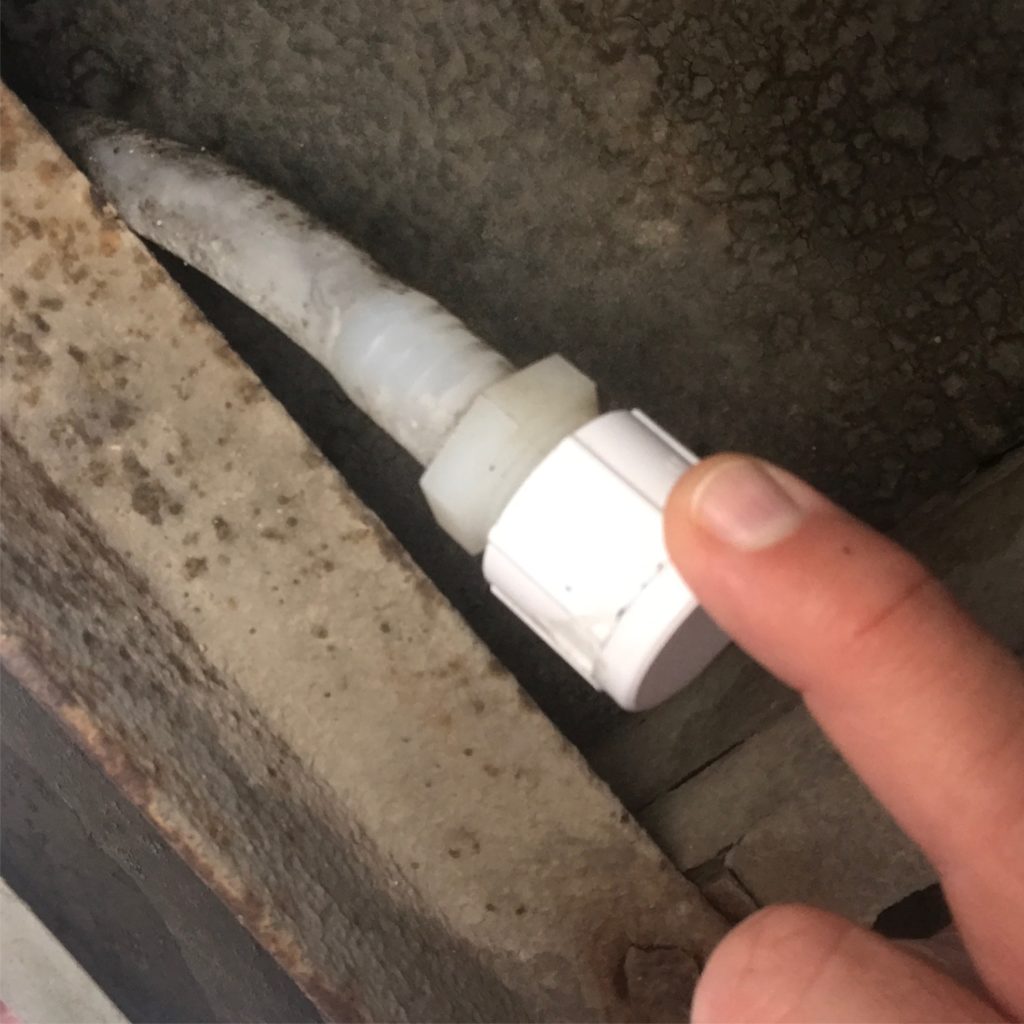
I created a two part fitting for the end of the hose that sticks out of the camper. The cap stays on until we are ready to use the air conditioner. Leaving the cap off is an open invitation to insects to build a nest in your unit. The photo below is the drain sticking out of the bottom of the camper. It has the cap on it in the photo.
Exhaust vent
The exhaust vent is the larger black circle at the top of our portable air conditioner. This blows warm air so you will also need to devise a system to send this warm air outside. Otherwise, you will be heating the space you are attempting to cool.
The unit comes with a connector piece that is meant to run out of a window. We were unable to utilize this due to how close our unit sits to the camper wall. I devised my own system using:
Louvered Dryer Vent Cap
Foil Duct Tape
Plywood
Aluminum Rigid Pipe
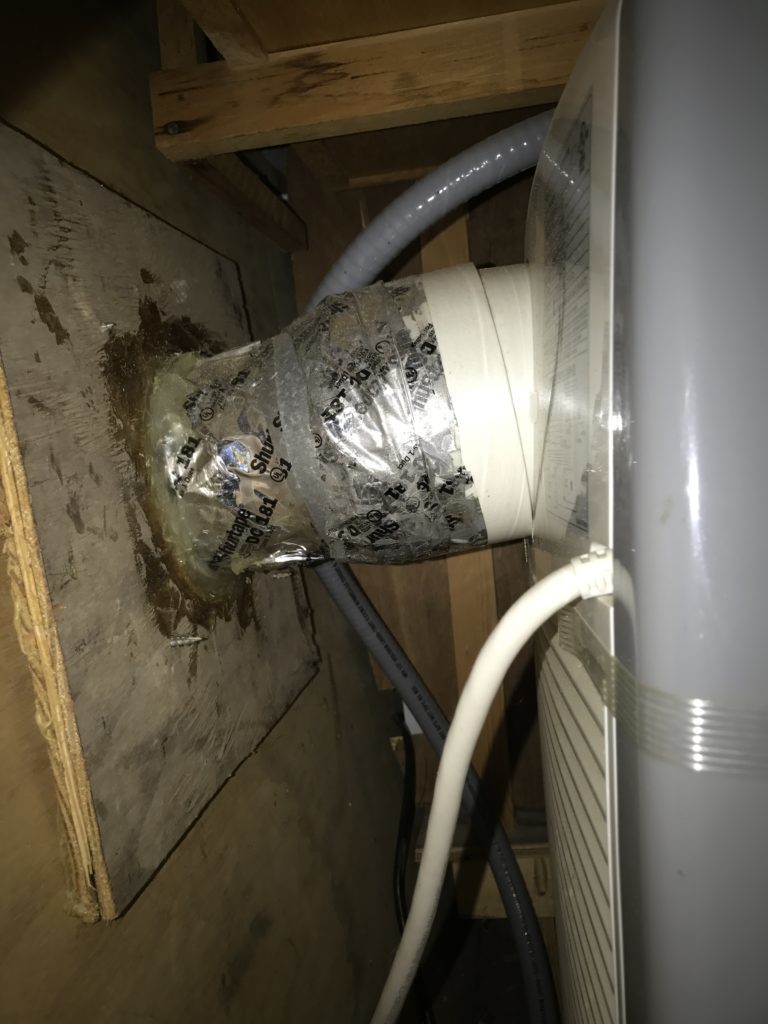
The photo above shows how the exhaust vent connects inside the trailer. I cut a circle in the plywood the same diameter as the aluminum rigid pipe that is connected to it. The plywood attaches to the camper so the louvered dryer vent had something to connect to other than the trailer’s thin skin and the birch paneling.
Below, you can see the vent I used (Cecilia needs a bath). I applied butyl tape to the vent and screwed it to the plywood on the inside of the wall.

This system has held up and the air conditioner runs flawlessly. I’m able to cool my camper during the hot summer months here in Missouri and it hasn’t required any maintenance.
You can read more about our vintage camper remodel and repairs here.

Hi Chris,
We live in Kansas. We just bought a 16 ft, including the tongue, 67 comet that is 90% gutted. We have a summer of projects ahead of us! We don’t mind, we love a good project and up for a challenge. However, we have just been hit with the realization that we do not have an air conditioned garage and our little canned ham style camper is already sweltering hot inside and we have only just begun to hit the upper 80 degree temperature marks. We are considering installing an a/c unit to help us handle the heat while we renovate.
This article has been very informative and helpful. Do you feel like the portable a/c unit keeps up well with heat? Are you happy with the temperature that you are able to maintain in your camper? Do you have any problems with your portable a/c unit freezing up?
Thank you!
Jill
Hi Jill, Congrats on your purchase. We were so thankful for the air conditioner during the hot summer days whether we were camping or working. The AC we purchases always worked well for us. It was still comfortable to camp in when temps got in the 90s. We did find it helped the trailer if we put her under some shade on the really warm days. The little AC had to work a little less. We never had a problem with it freezing up.
Hey Chris!
Thank you so much for this information!!!!! I have a 2013 Sprinter that I am using as a mobile art gallery (and staying in it overnight when out of town)
Any suggestions on what can be done to drain and vent if I don’t want to drill any holes in the van. Would the front window be of any use for ventilation?
Thanks for sharing!!!
Vicky Earley
The key to these units is exhausting hot air back out of the space you are trying to cool and also have a drain for the condensation from the unit. I believe these units come with an adapter piece to put in a normal house window to hook up the exhaust hose. You might be able to adapt that to your van window. Depending on the humidity level where you are located these units could condense quite a bit. The tray that they come with might not be sufficient enough. If you live in a dryer climate, the tray might work.
Thanks for this great information! I purchased the same Ac unit and am in the process of figuring out exactly how to install it in my 1978 Patriot travel trailer. Your drain tips and pics will be super helpful! How did you secure your unit so it doesn’t move while traveling?
Ours fit pretty snug into the space. Were you able to get yours installed?
Just installed the same unit in our 17’ 1979 travel trailer that my son-in-law and I rebuilt about 7 years ago.
The unit compressor runs for about 15 seconds and then turns off and only the fan runs for about two minutes. The compressor and cold air come on for 15 seconds again and once again cycles itself to fan only. Any thoughts???
We never had that problem with our unit. Did you get the issue resolved?