
 I’ve spent a lot of time studying vintage camper exterior paint. We haven’t painted the outside of Cecilia yet. The plan was to paint in the spring, but the pollen counts said no. We were living under a green cloud of pollen and I didn’t want that in the paint. This week, we are taking Cecilia up to my father-in-law’s house because his yard is a much better space for painting. Cecilia can’t go in our yard or driveway so when we bring her home she has to sit in the road in front of the house.
I’m not going to say the painting method we have finally decided on out of fear that we will change our minds yet again. There really are a lot of pros and cons to all of the different methods. I will say, there are the 5 options for vintage camper exterior paint that I always come back to.
5 Options for Vintage Camper Exterior Paint
Roll on Latex Paint
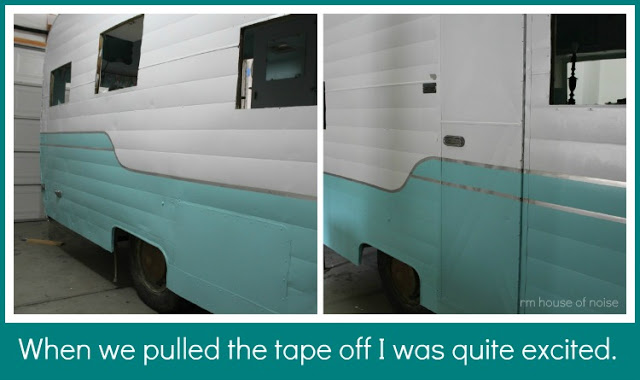
House of Noise makes the top of my list because the supplies are easy to find and she also mentions that the paint job has held up for a few years. That is important, because most people seem to write about the paint job on their vintage camper soon after it is complete and we don’t hear about it again. I want a durable coat of paint that is going to withstand the weather and drive down the road. House of Noise seems to have found that.
Spray on Automotive Paint

Mandi at Vintage Revivals went with the option that seems to be the most recommended by professionals. In fact, she went to a friend who worked with automotive paint to get the help she needed. If this is something that is an option for you, go this route without thinking twice. You will get the most out of this type of paint job.
Roll on & Brush on Sher-Cryl
While Whippycake hasn’t had this paint on her camper long enough to atest to the durability, I am a fan of the paint she used. When looking over our options for painting Cecilia, we always come back to this Sher-Cryl HPA SEMI-Gloss paint.
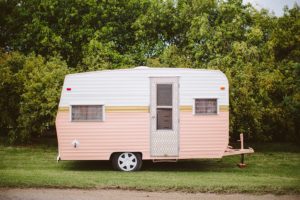
Rustoleum Rattle Can
If you are looking for the most affordable option then the Rustoleum rattle can paint job is for you. The biggest downside to this method would be the limited paint color options. The upsides are that it dries fast, it doesn’t require special equipment, and it is easy to achieve a great look.
Tractor Paint
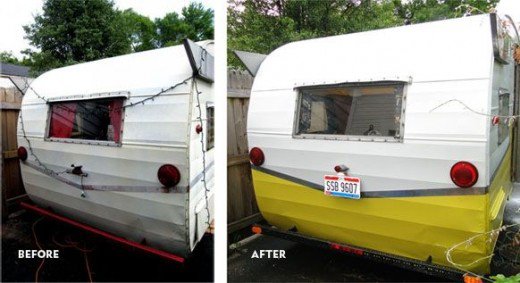
AxleAddict went the route of using tractor paint. While their web site doesn’t offer a tutorial, I do like that they say the paint job was still holding up a year down the road. Again, you are going to be limited on colors if you use tractor paint, but it is guaranteed to withstand weathering.
Check back in because next week I will be painting my vintage camper as long as the weather cooperates. Wish us luck!


I’m about ready to paint my 1964 Aladdin Genie. It’s been a long time coming, and I want to do it right. Have you gotten any new revelations since last year? I’m leaning toward DIY spray job with a compressor and gun, but my spray skills require a forgiving paint.
We ended up going with the Sher-cryl from Sherwin Williams and rolling it on. It worked out great and still looks awesome.
Did you use a primer w the sher-cryl ?
We only used primer on Cecilia on a few bare spots and rear skin section that we replaced. Everywhere else had the original paint that we just sanded and cleaned really well.
Hi Tina
I am also thinking of using the Sher-Cryl paint. I was wondering if you got your trailer down to bare metal before you painted it and if you used a primer. How many gallons of paint did you use? How long has the paint lasted?
Thank you so much for your time!
No we did not have to sand/strip the camper to bare metal. The paint was not flaking off so we sanded it(which helped to remove the oxidation) and cleaned it really well. We did prime the new back panel that was replaced and a few other spots that had no paint. On Cecilia we purchased a gallon of each color. The paint is holding up great.
How did you prep for painting? I read Whippy cakes and wanted to go that route but wire brushes leaves scratches ?????
I think it depends on what your camper skin is made of. Hers looked more like solid aluminum than the fragile aluminum skins of older trailers (like mine) I’ve found that either Citristrip or a paint stripper along with a plastic scraper works fine with a little work. But it doesn’t damage the skin in any way.
We did not sand/strip down to bare metal prior to painting. The original paint on Cecilia was not flaking off, it was only oxidized. Prior to painting we lightly sanded everything and if paint was missing we simply sand the edges down to not show through the new coat of paint. Sher-Cryl had no problem bonding to the old paint. We did have to sand and prime the new rear panel and a few other areas that was bare metal.